Installing and configuring WireGuard VPN server
- In this guide we will tell you how to quickly install and run a VPN on a virtual server, using Ubuntu 22.04 as an example
- Before installation, you must select and order a VDS tariff plan
- After ordering and activating the server, you can begin creating a VPN server
- If you need help with installation, you can create a request to technical support and we will install WireGuard for free on your vds
Installing WireGuard server
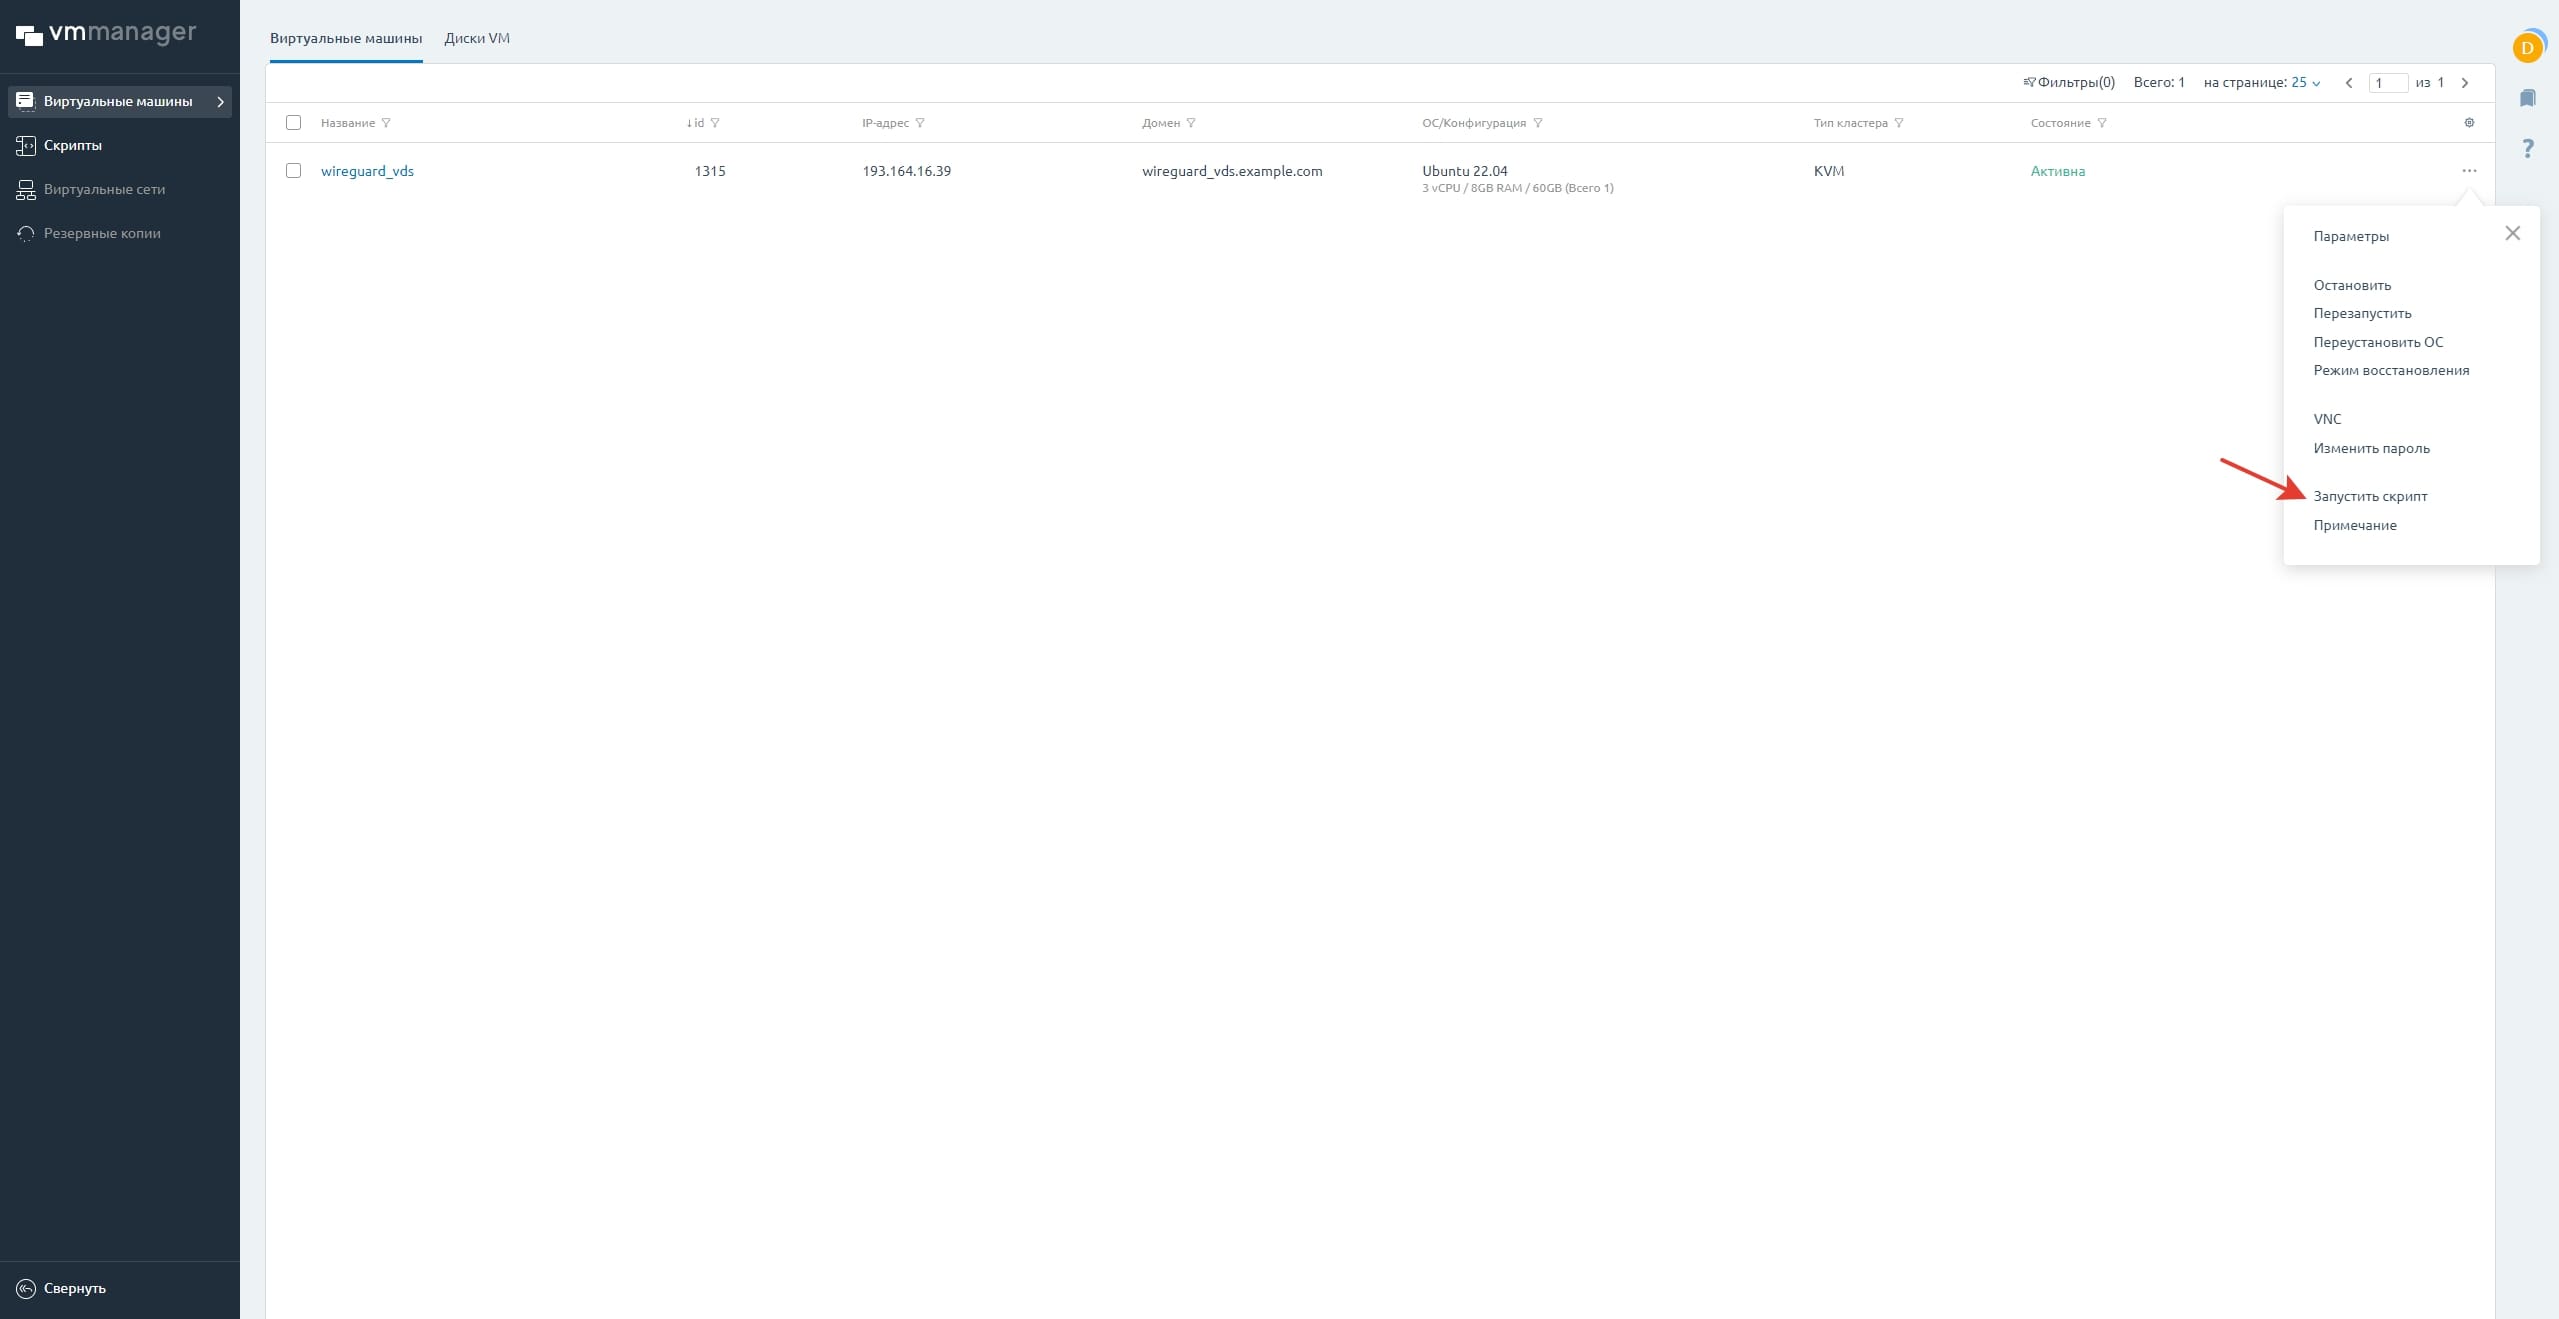
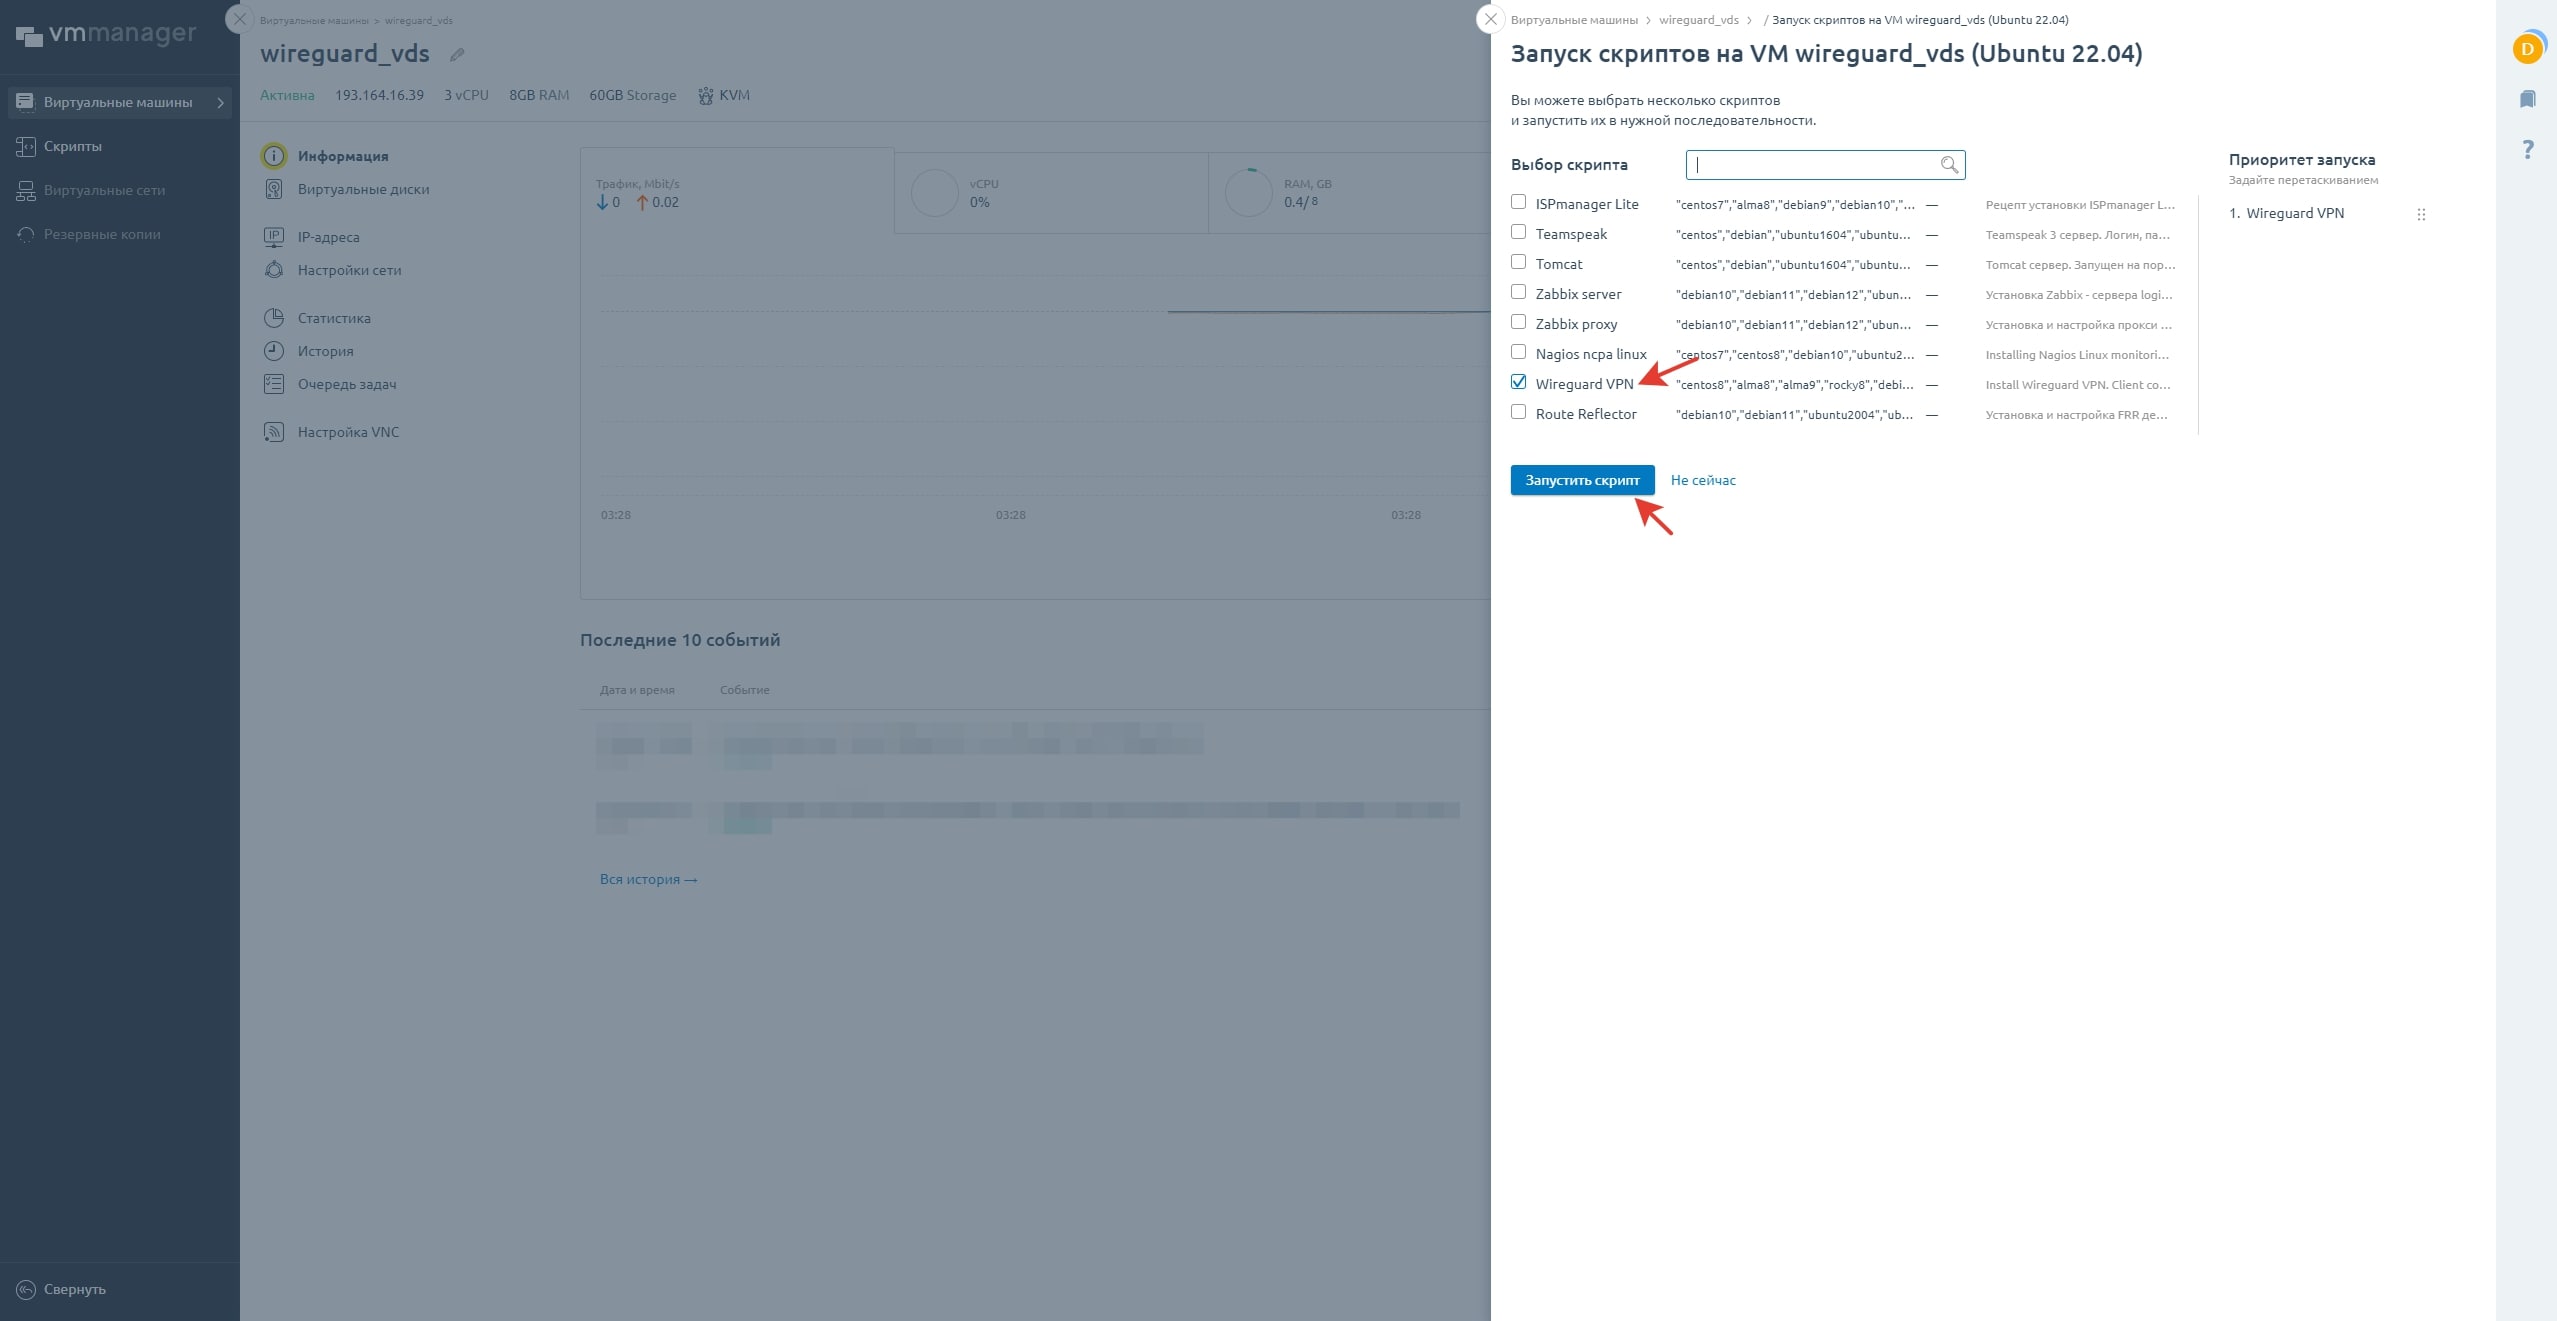
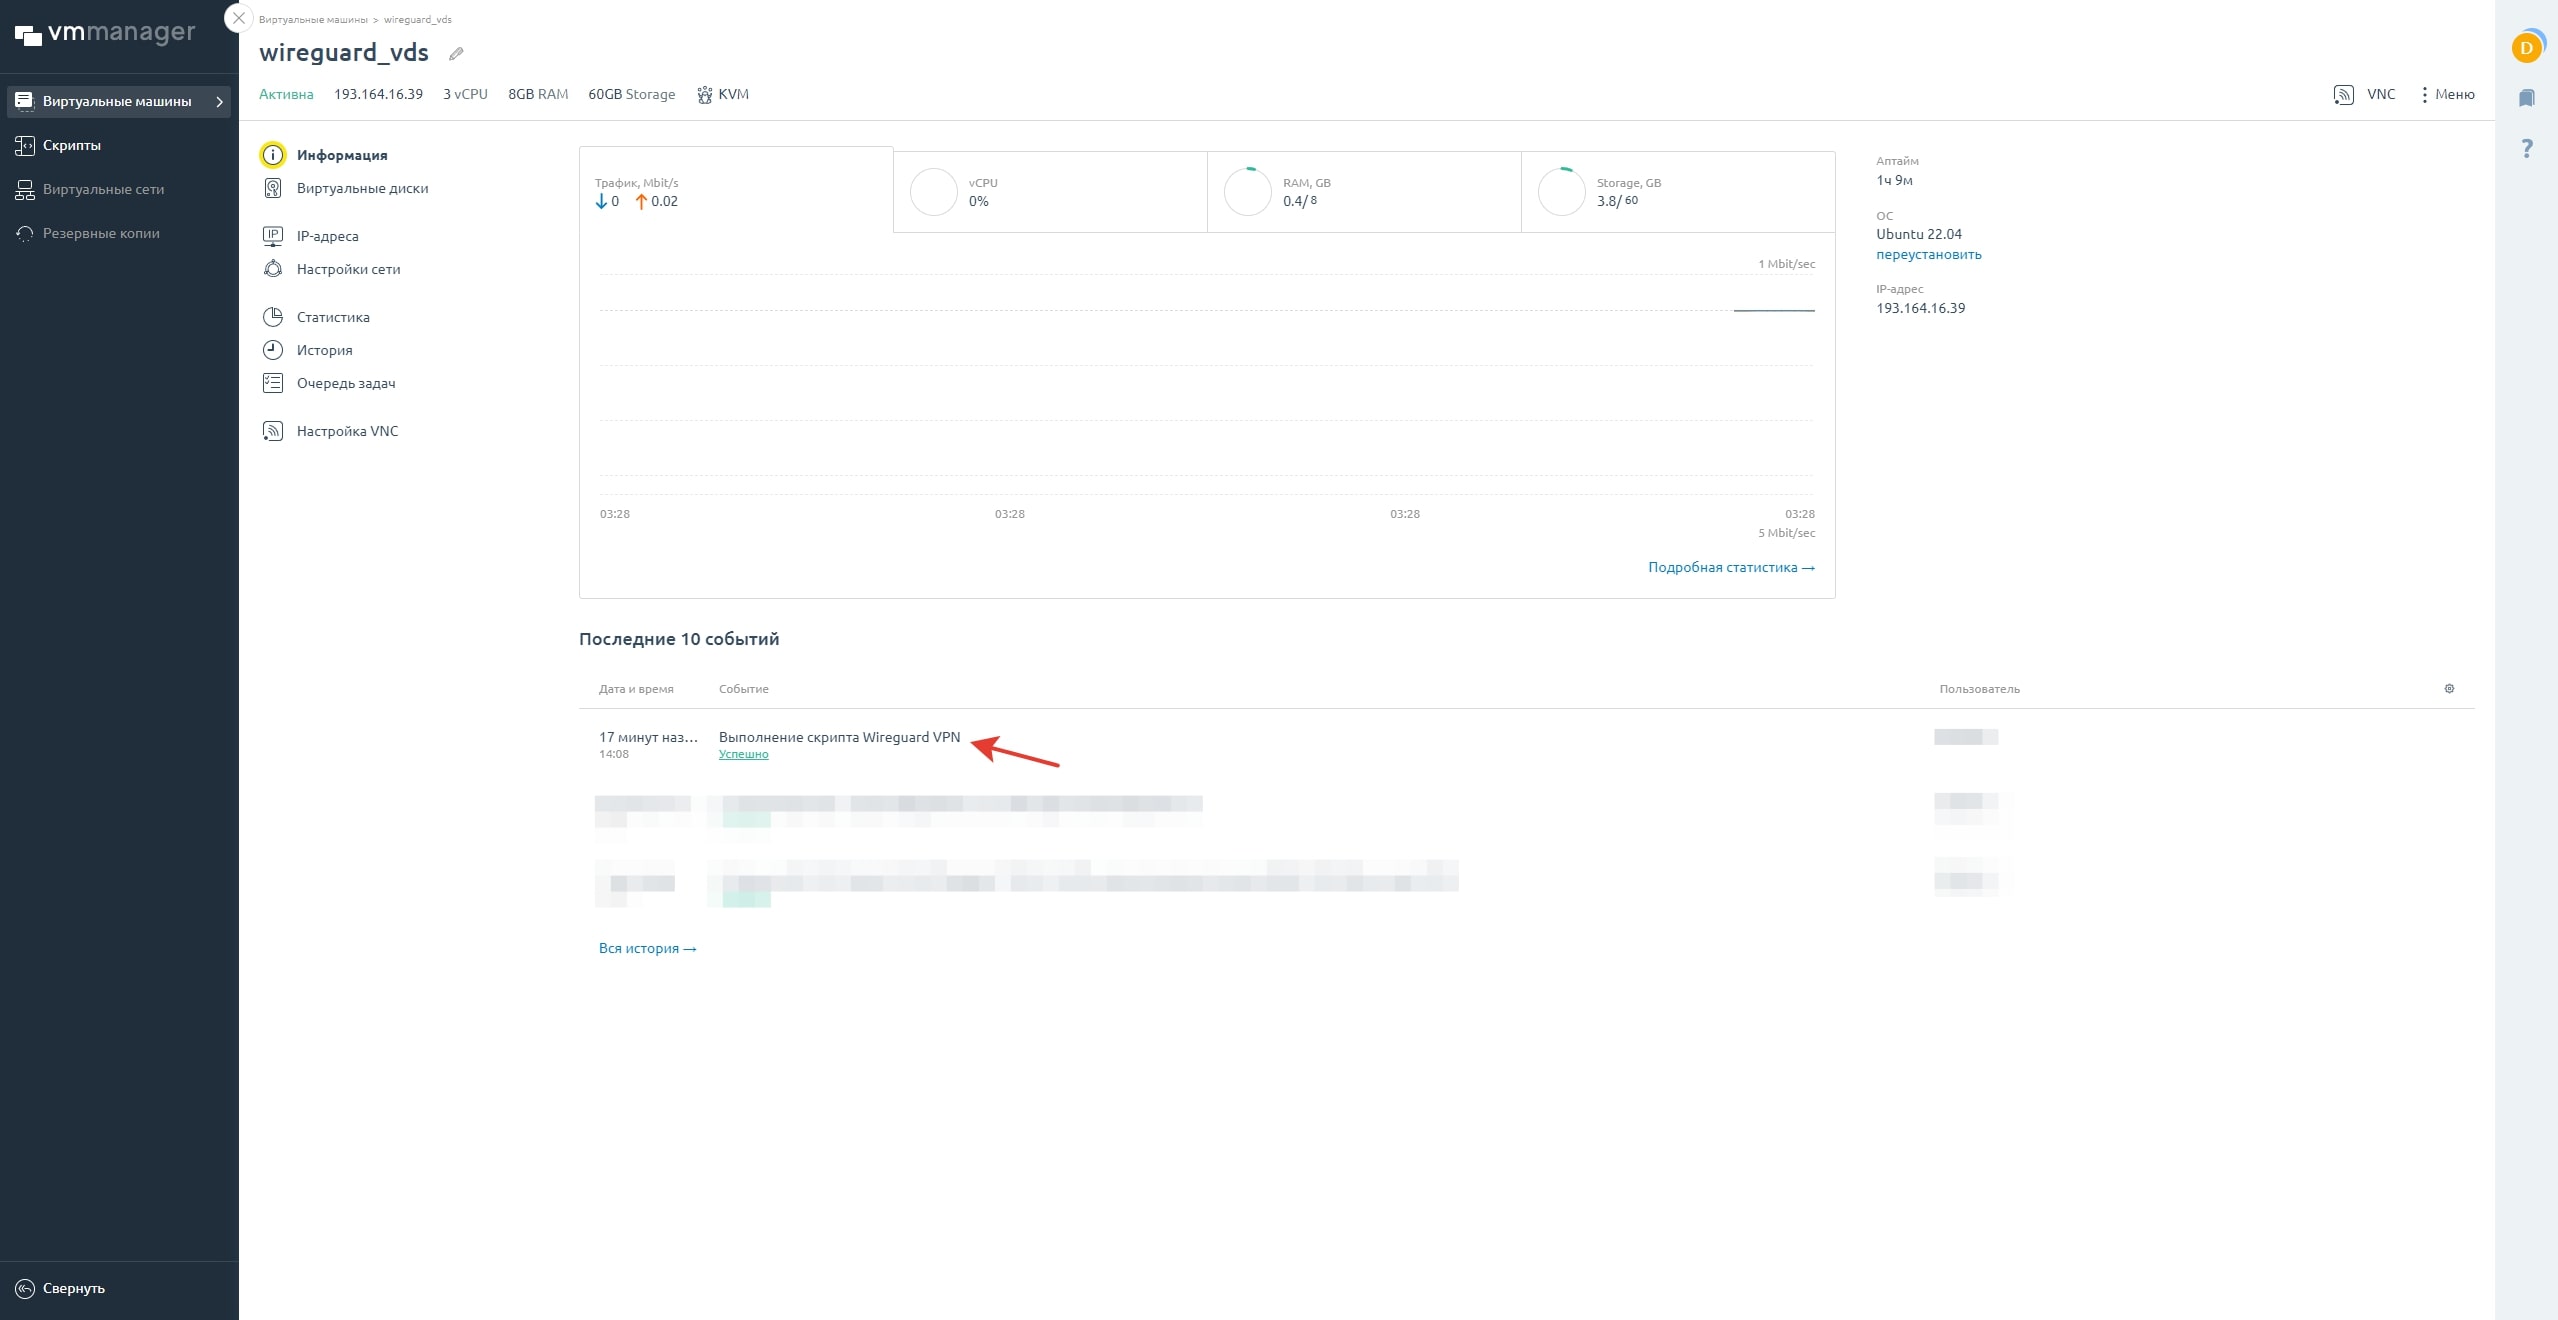
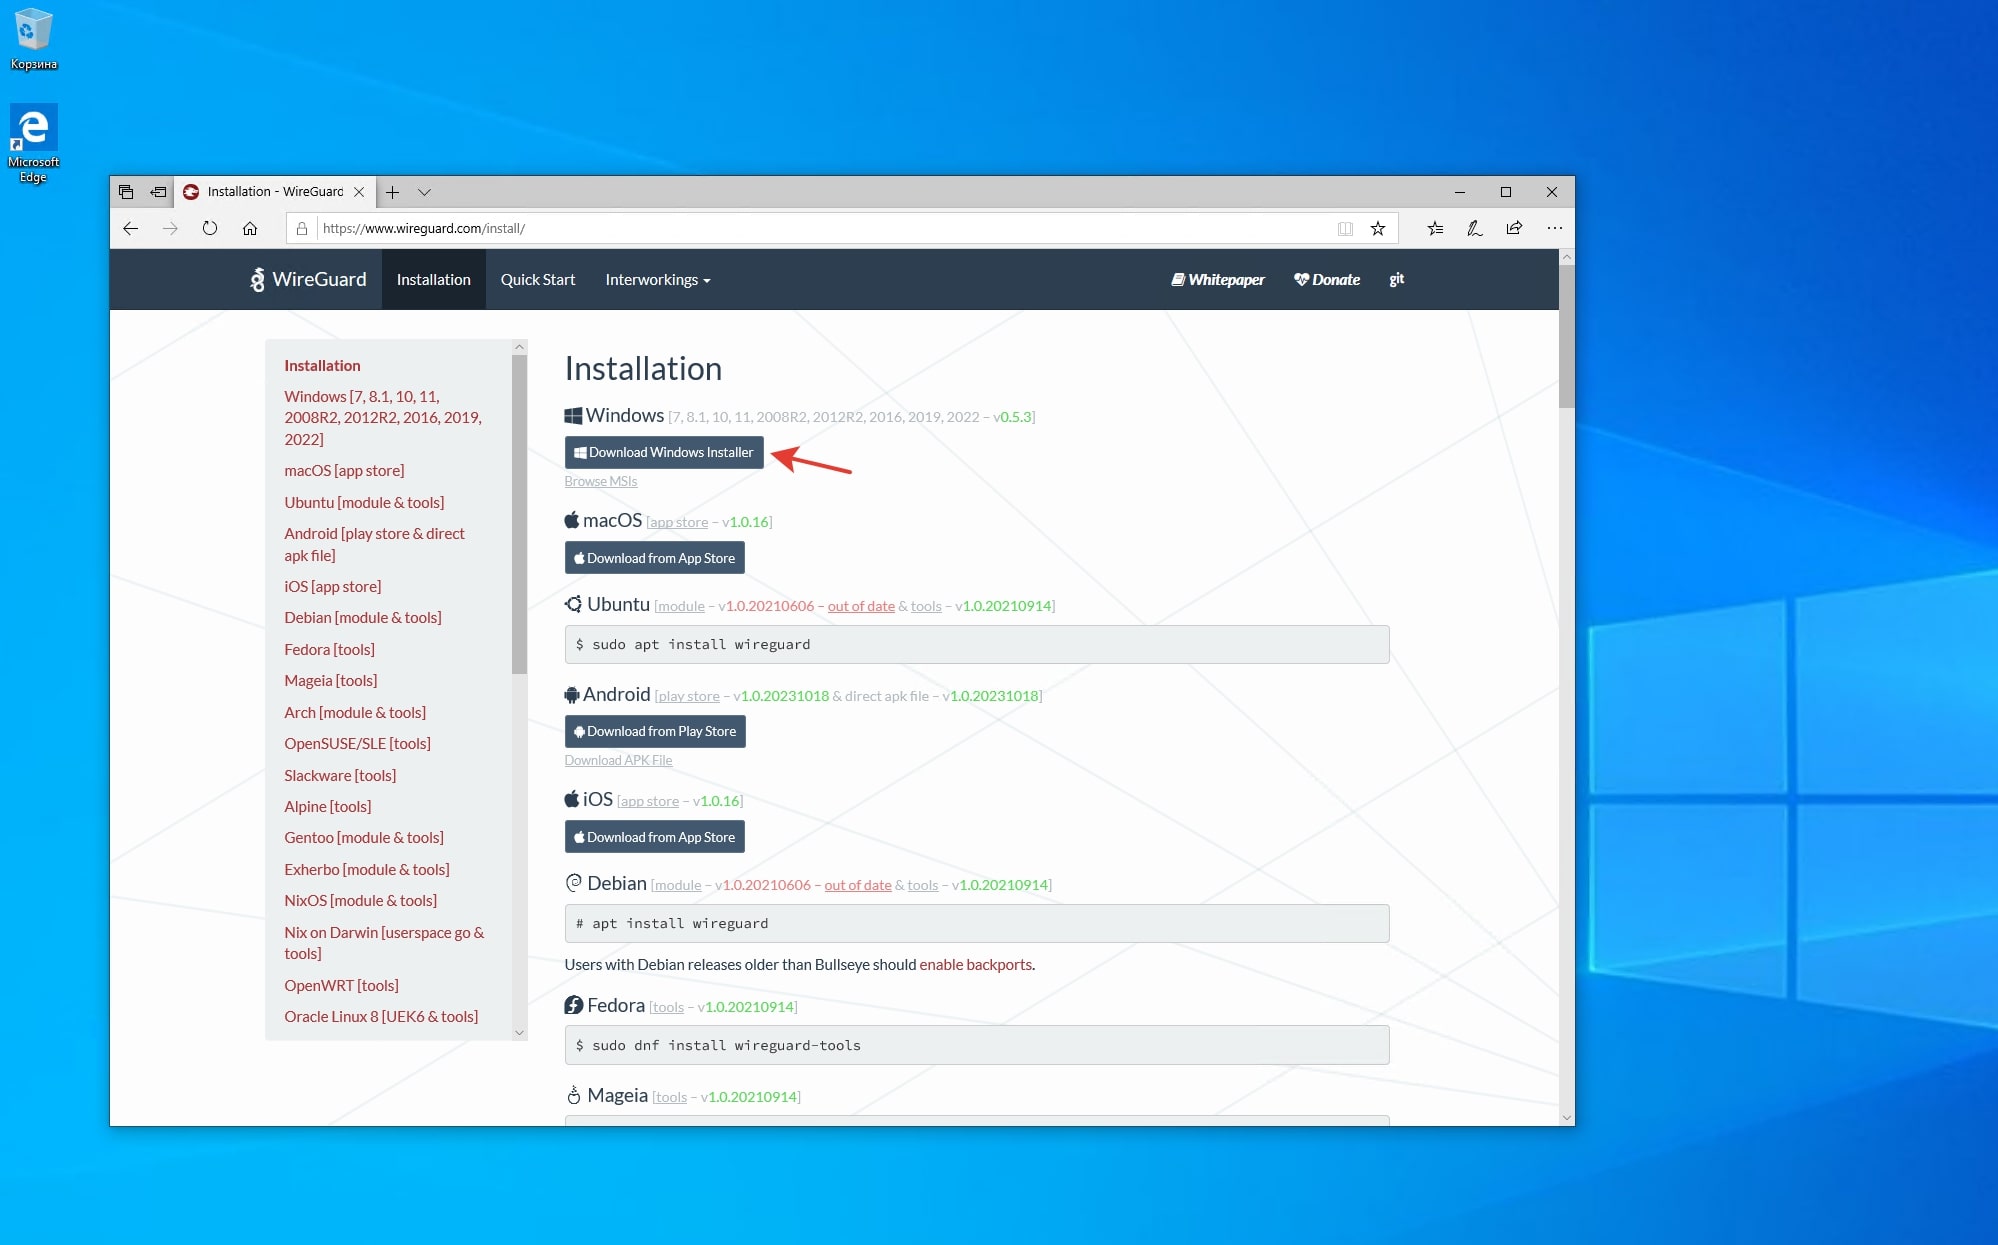
After ordering and activating the vds service, a letter with information about the order will be sent to your email, which will contain data for access to the vmmanager server control panel. WireGuard is provided free of charge, installation is available in the vmmanager panel in the server options menu (supported operating systems are centos8, alma8, alma9, rocky8, debian10, debian11, ubuntu 20.04, ubuntu 22.04). Click on "Run script", select Wireguard VPN and start the installation. Wait for the installation to complete; a notification about successful installation will appear in the event history. You also need to download and install the program client WireGuard to your PC.
Setting up a WireGuard VPN connection
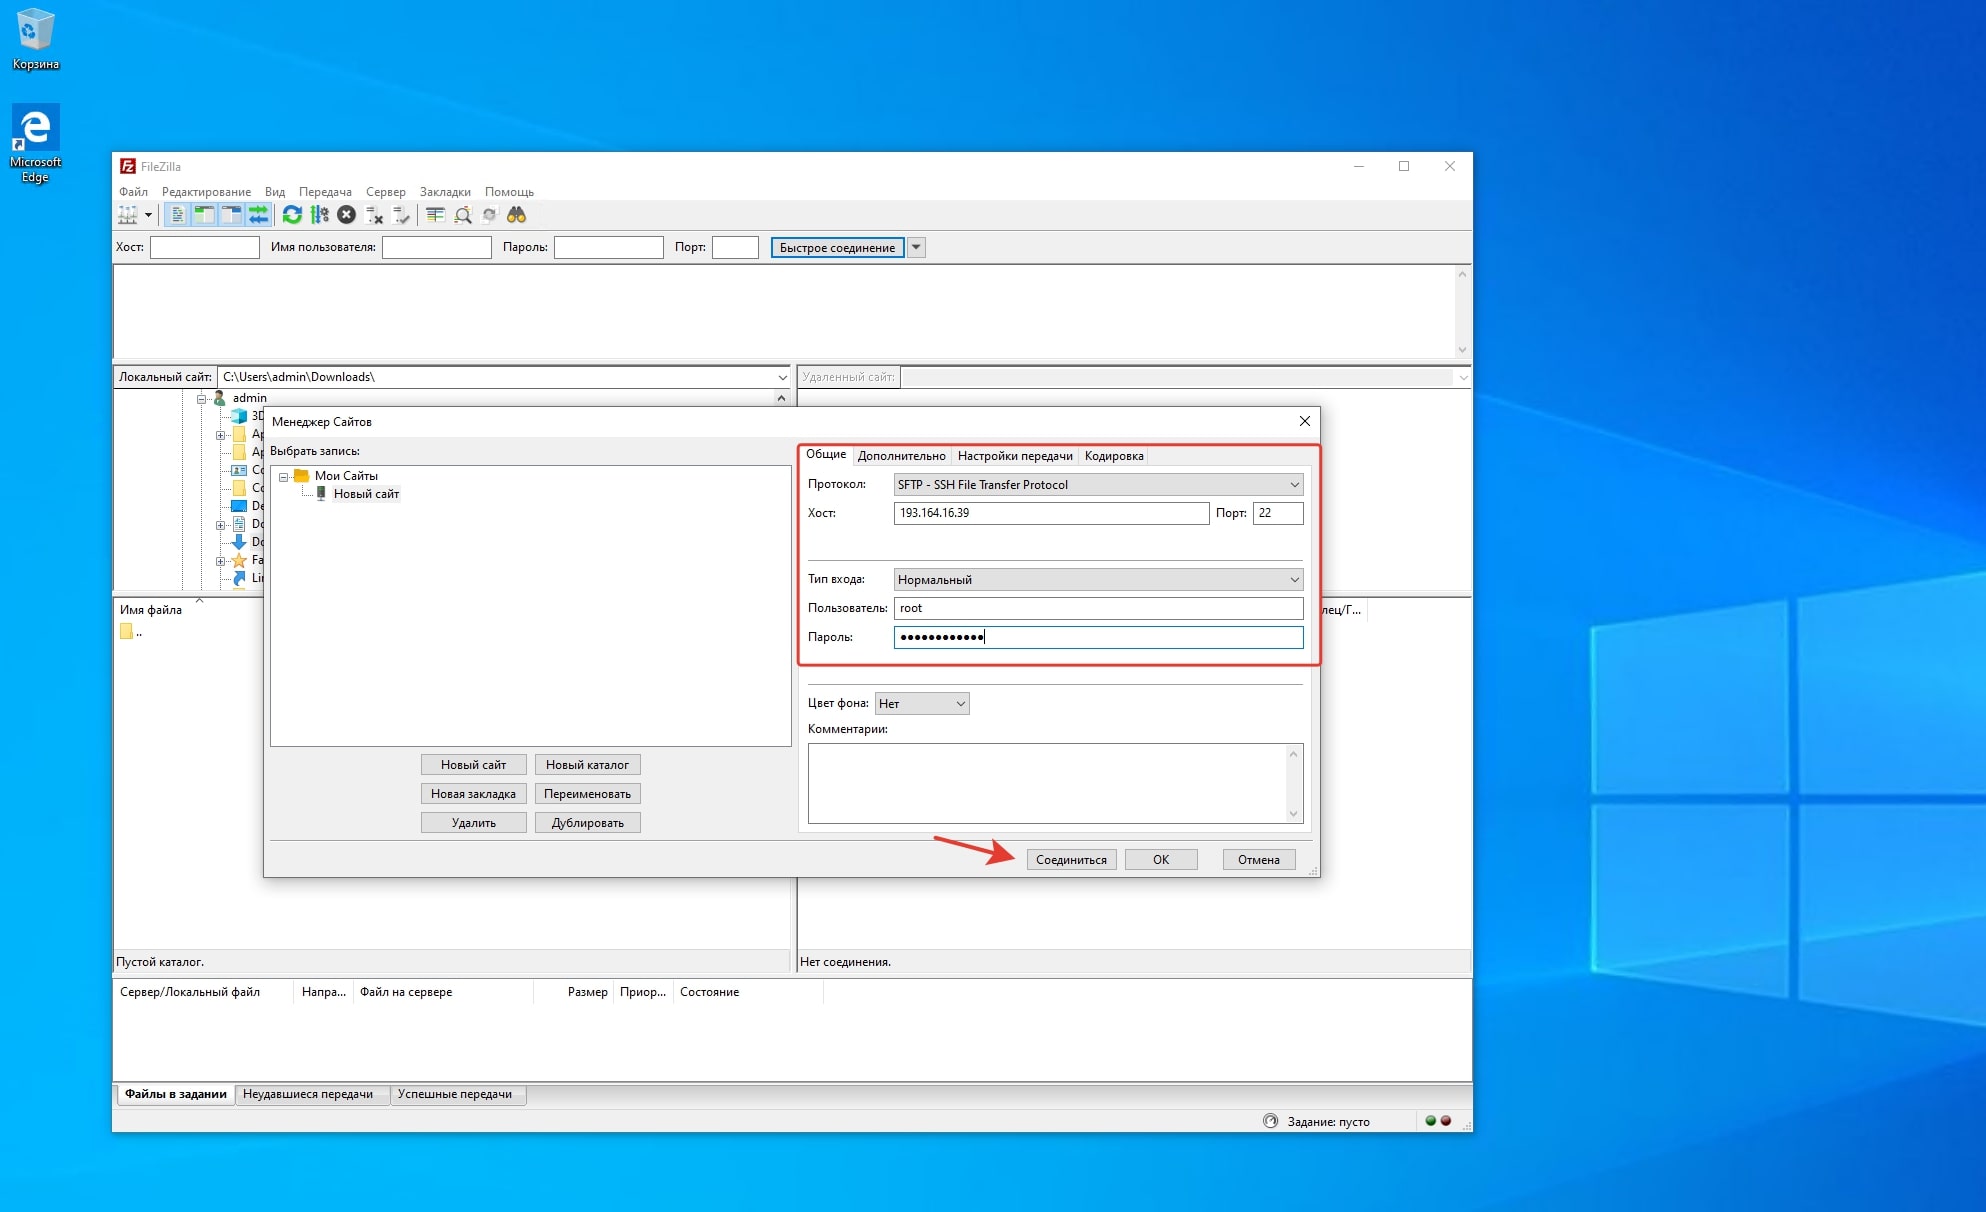
Once the automatic installation is complete, the VPN server is ready for use. WireGuard configuration files are located on the virtual server, in the "/etc/wireguard/" directory, user settings in the "/etc/wireguard/client/" directory. To start working with VPN, you need to download the user configuration file from the server to your computer. This can be done using FTP. Connect to your server using the sftp protocol and download the configuration file client.conf, which is located at the path "/etc/wireguard/client/clientXXX/" (where clientXXXname of the directory created during user installation)

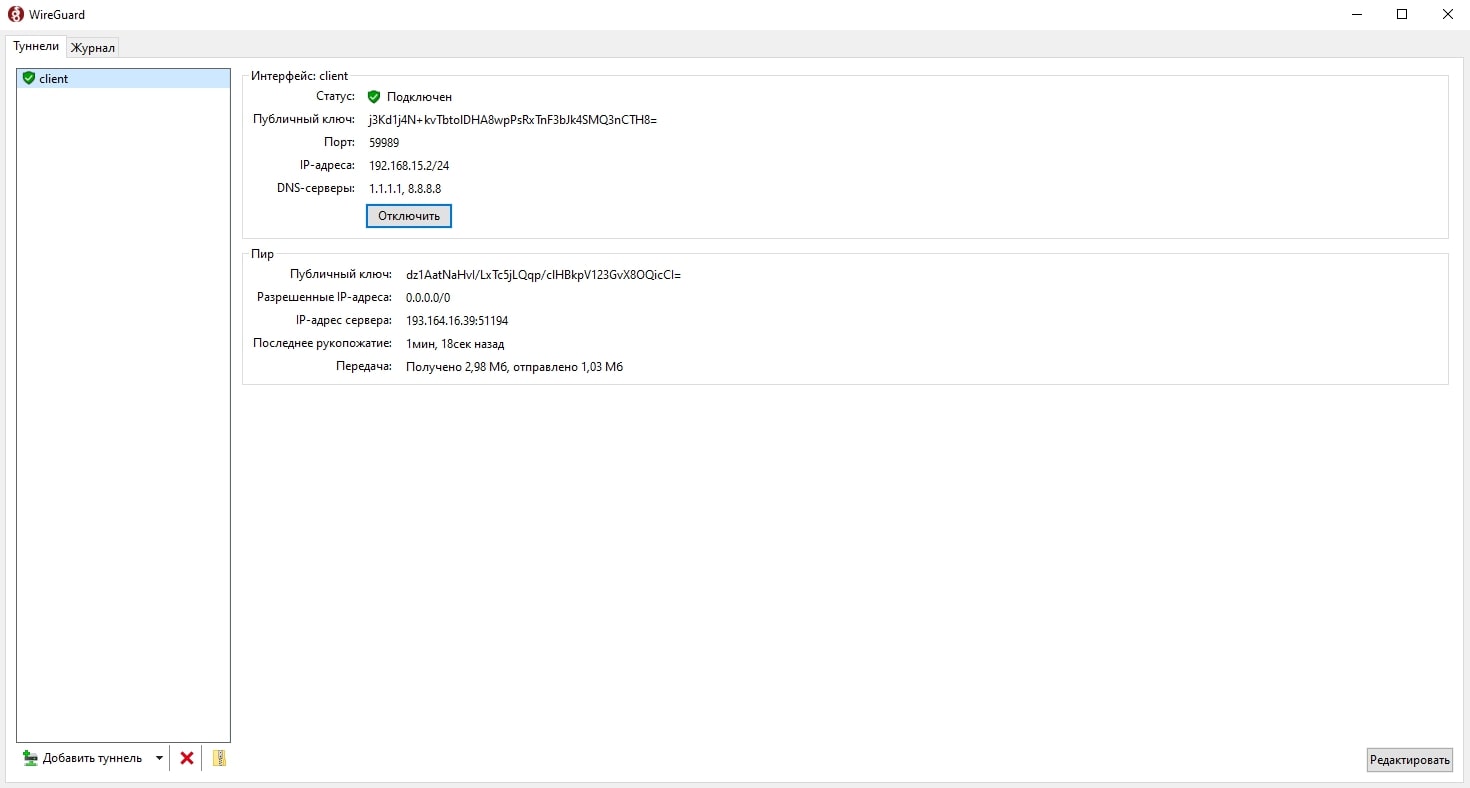
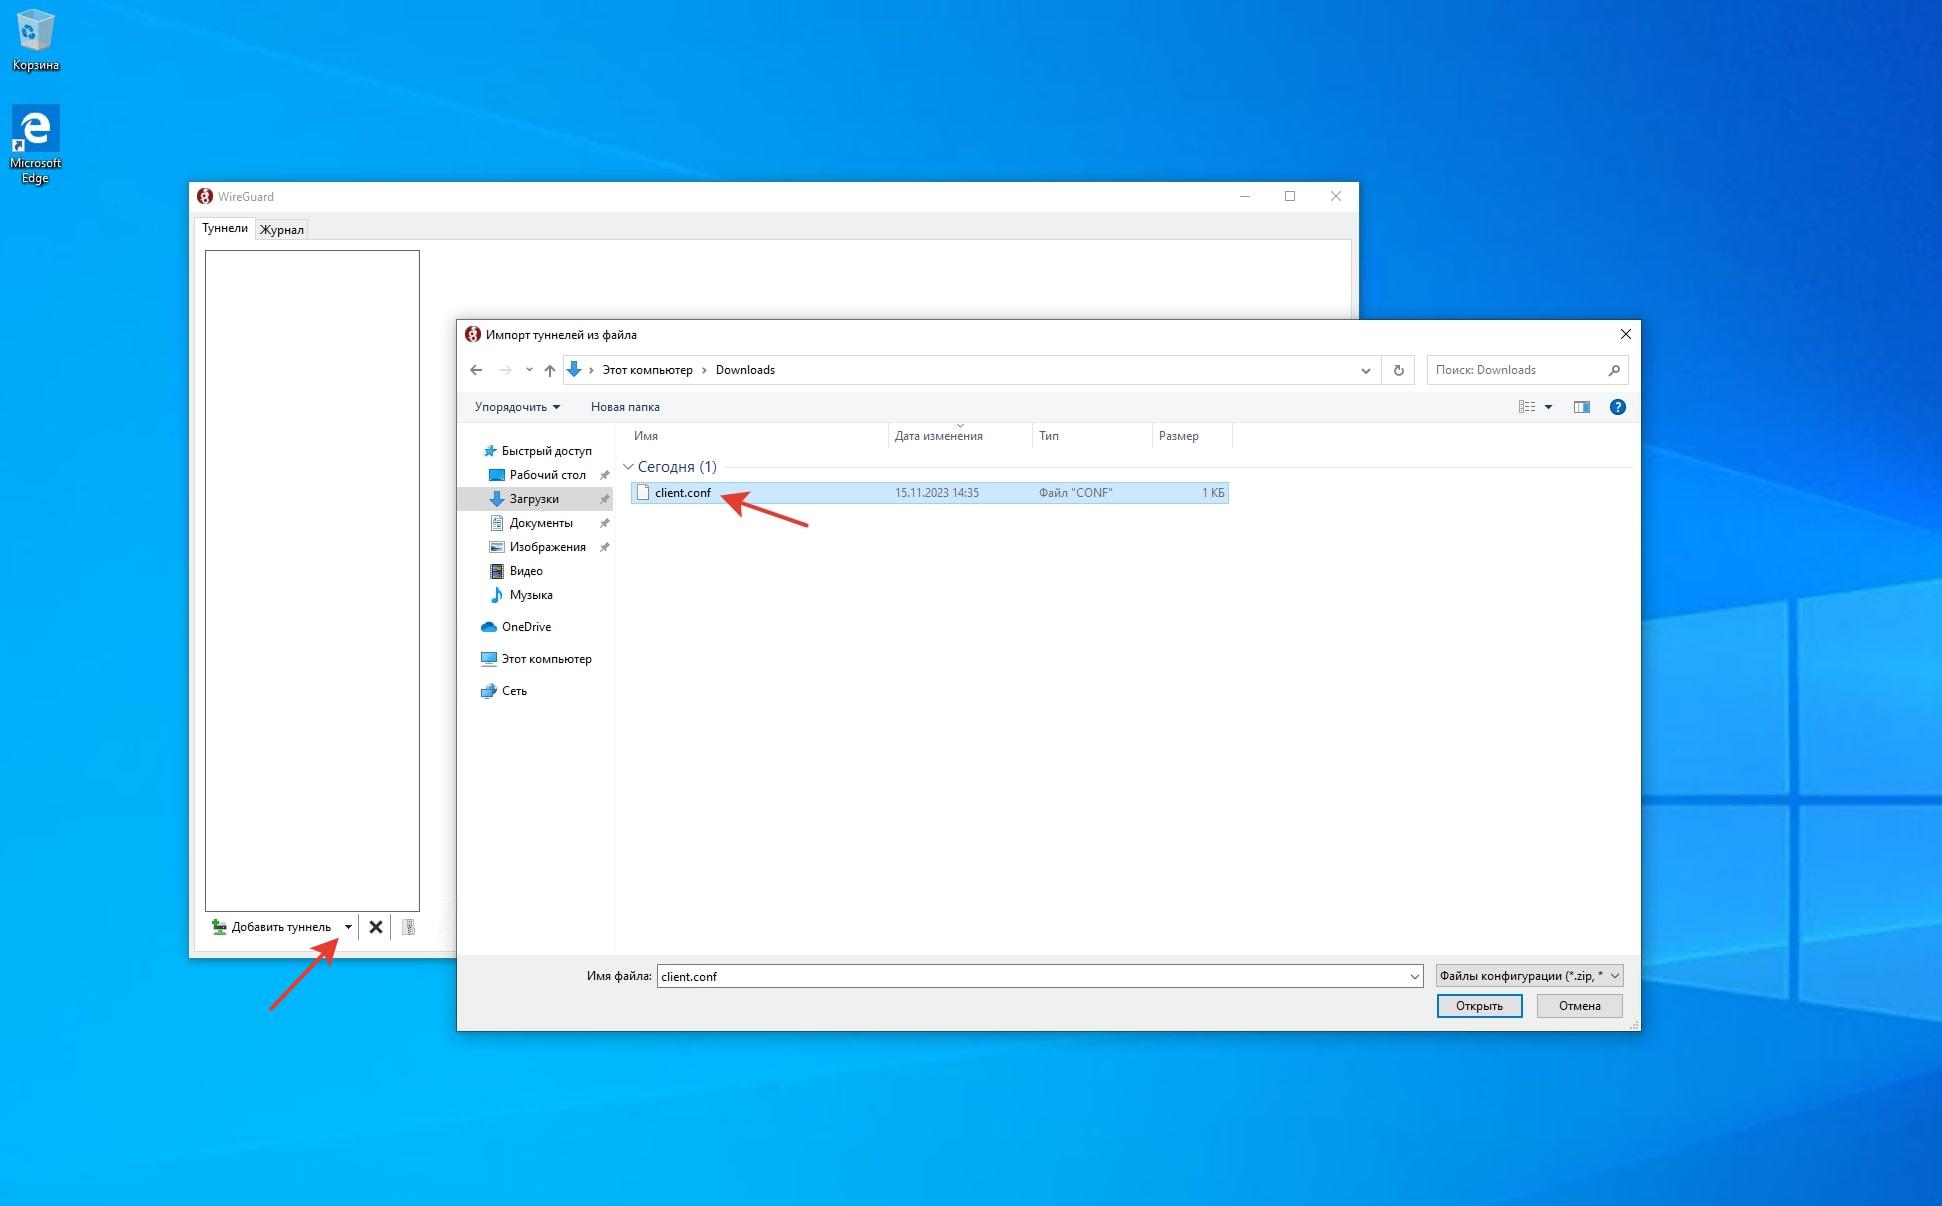
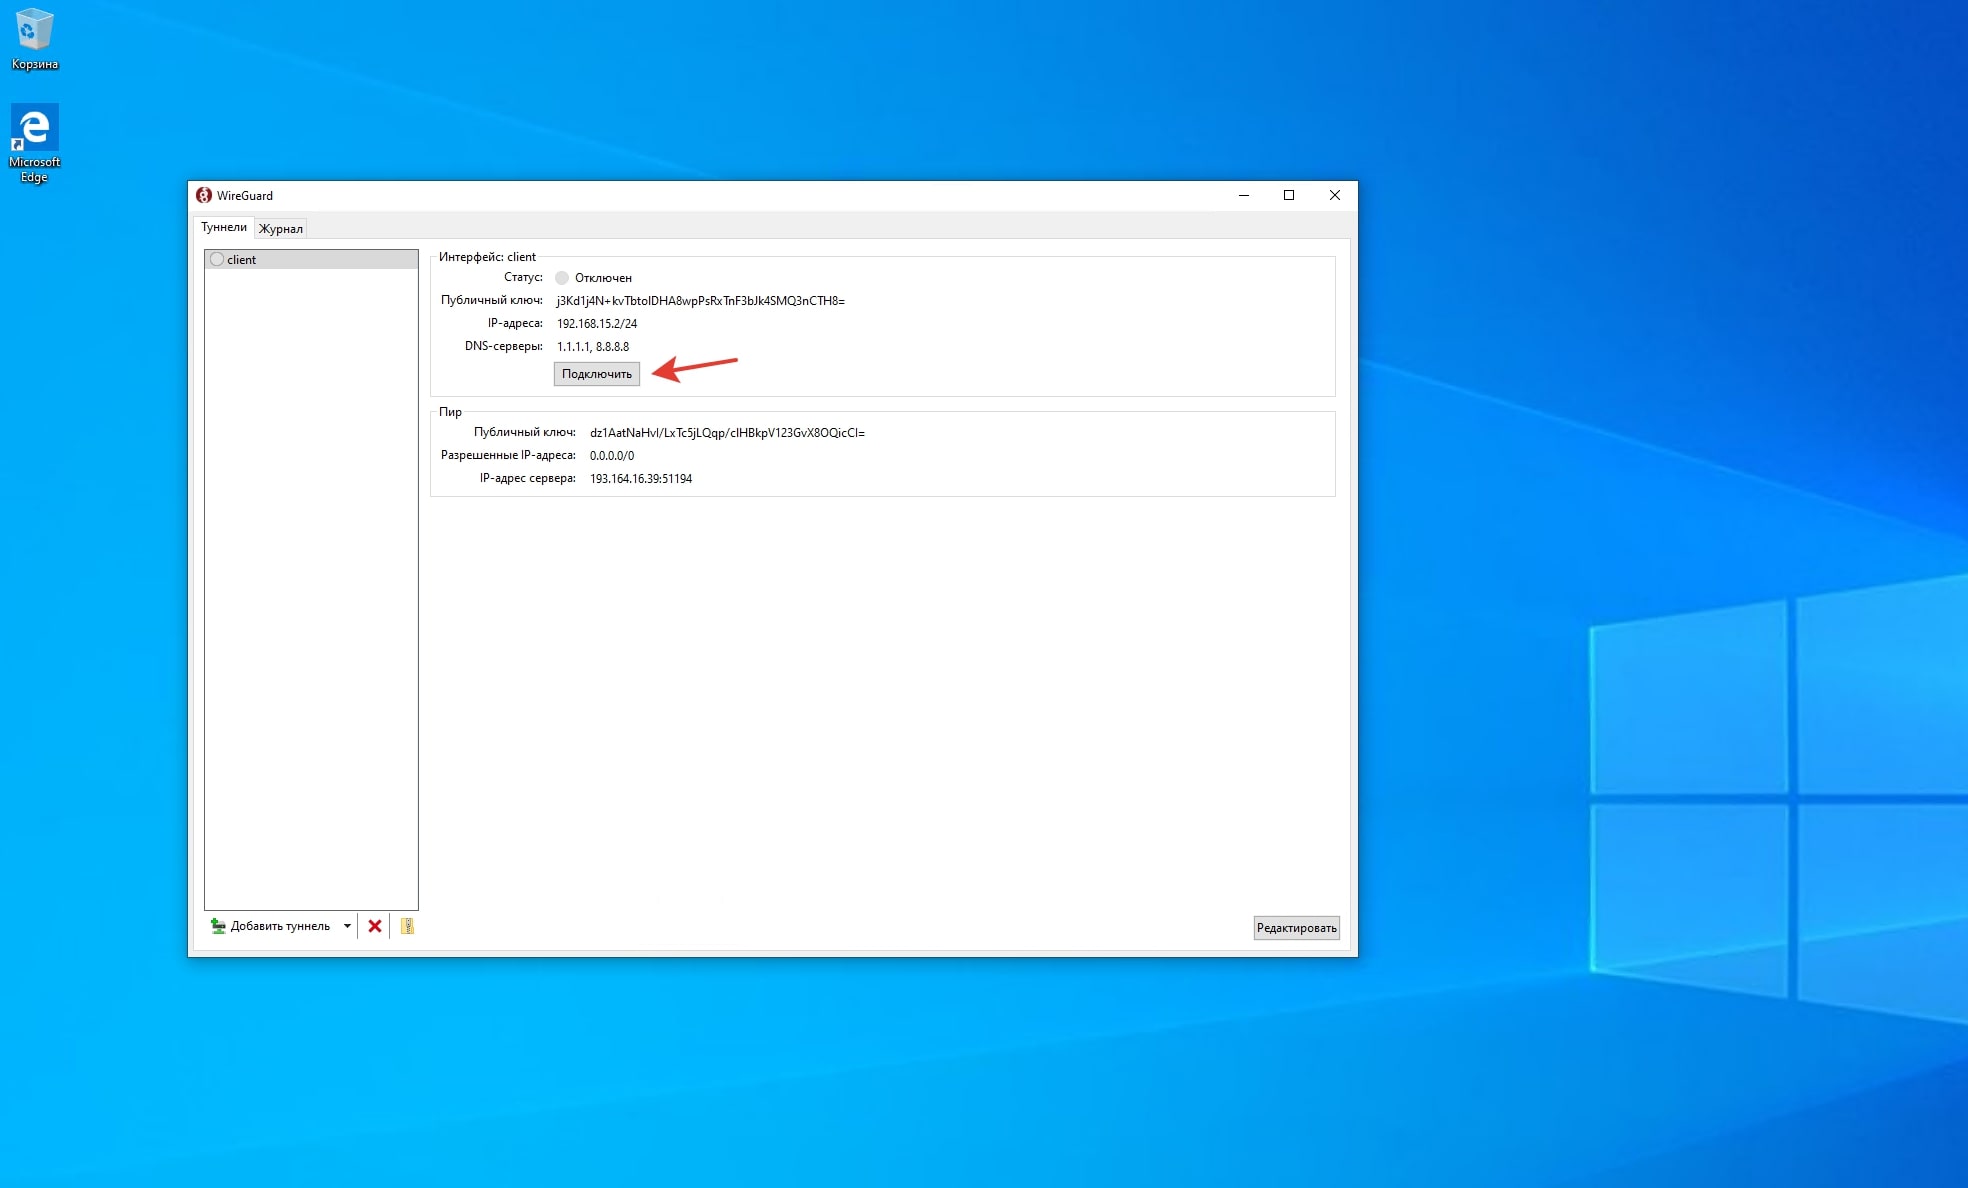
Launch the WireGuard application on your PC and import the configuration file that was downloaded from the server.
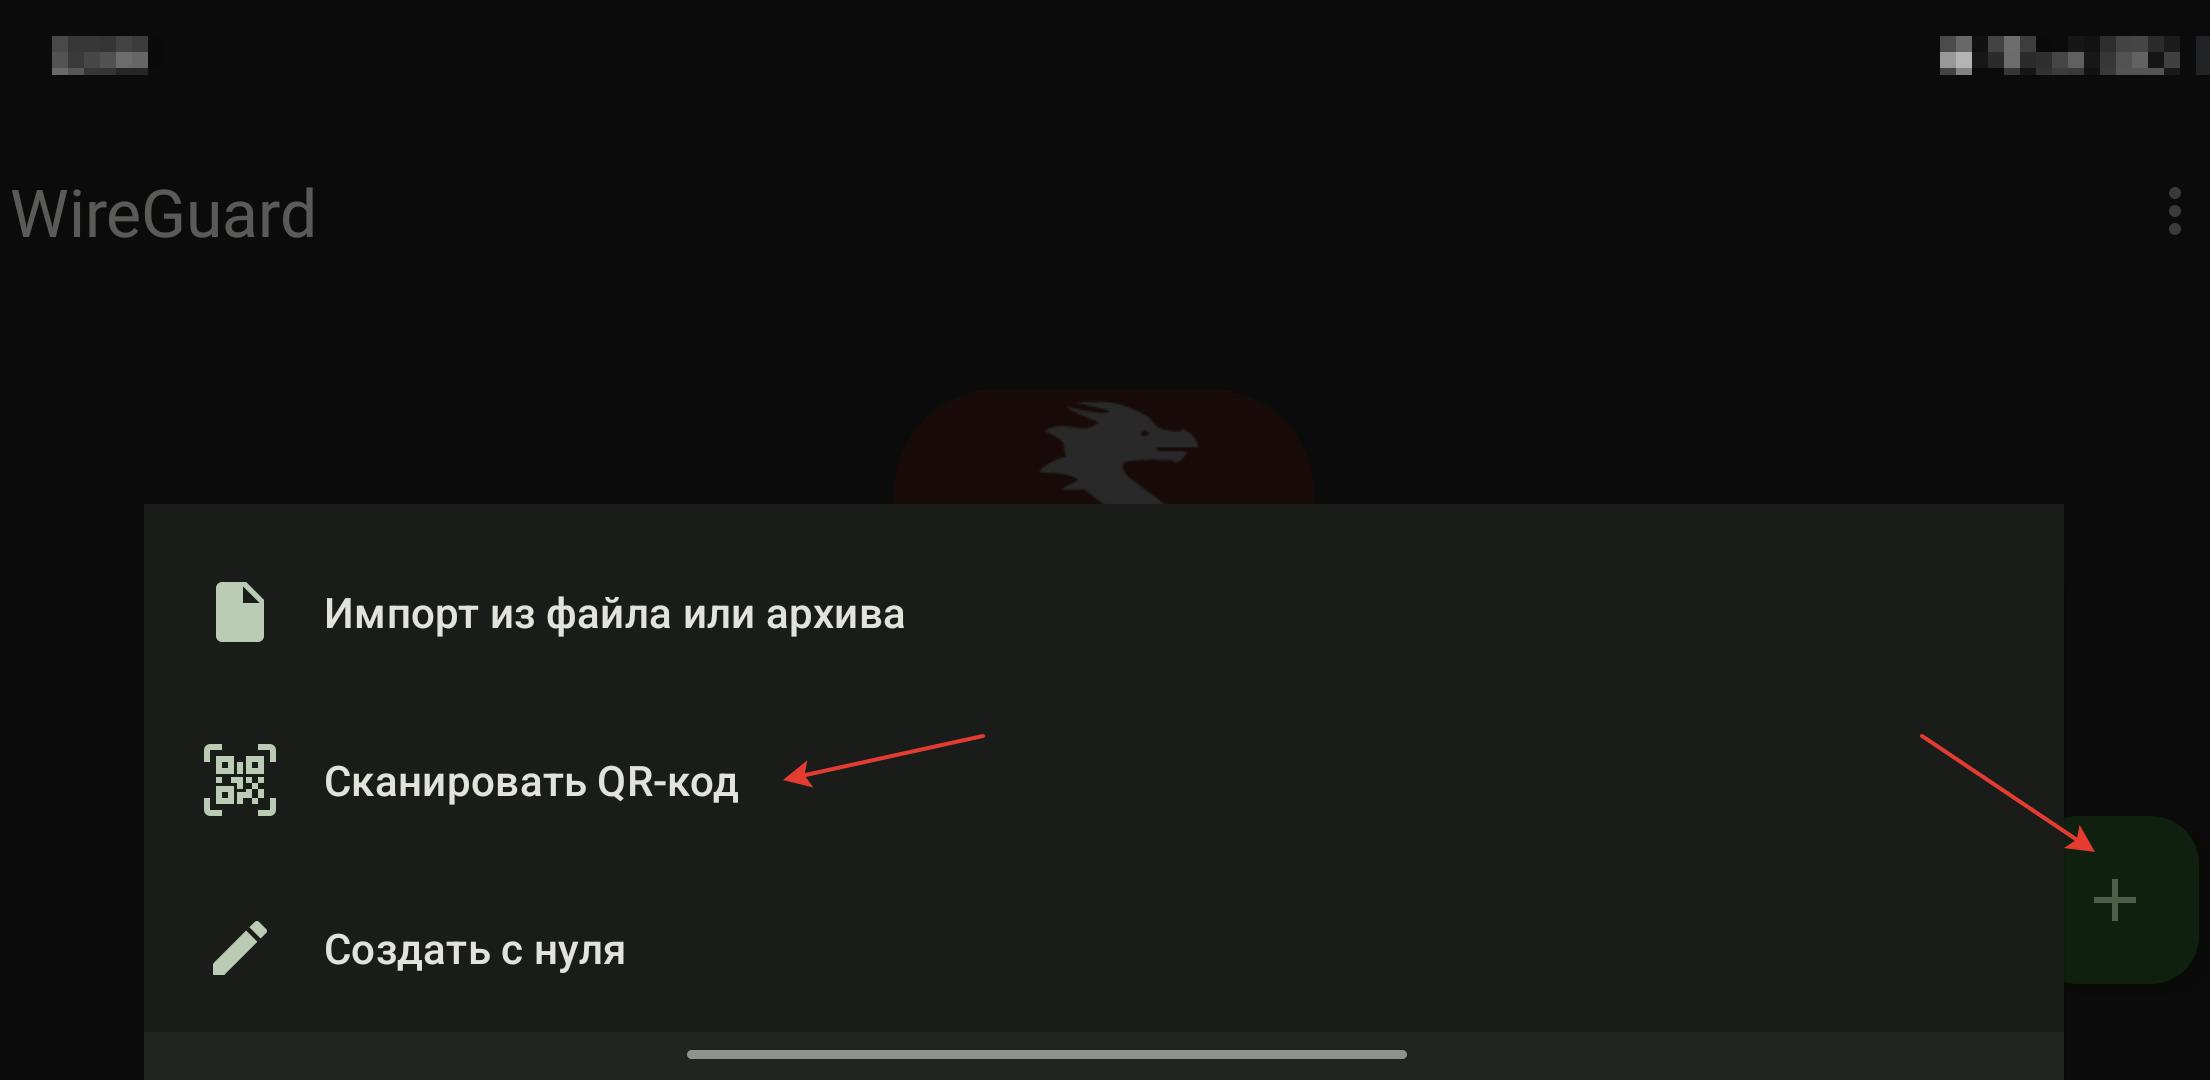
If you plan to use a VPN on your phone, you can download the WireGuard client to your mobile device, then upload the configuration using the QR code. To generate code, install the qrencode utility on the server (example command for Ubuntu OS: apt-get install qrencode ). Then enter the command qrencode -t ansiutf8 < /etc/wireguard/client/clientXXX/client.conf (where clientXXX is the name of the user directory).

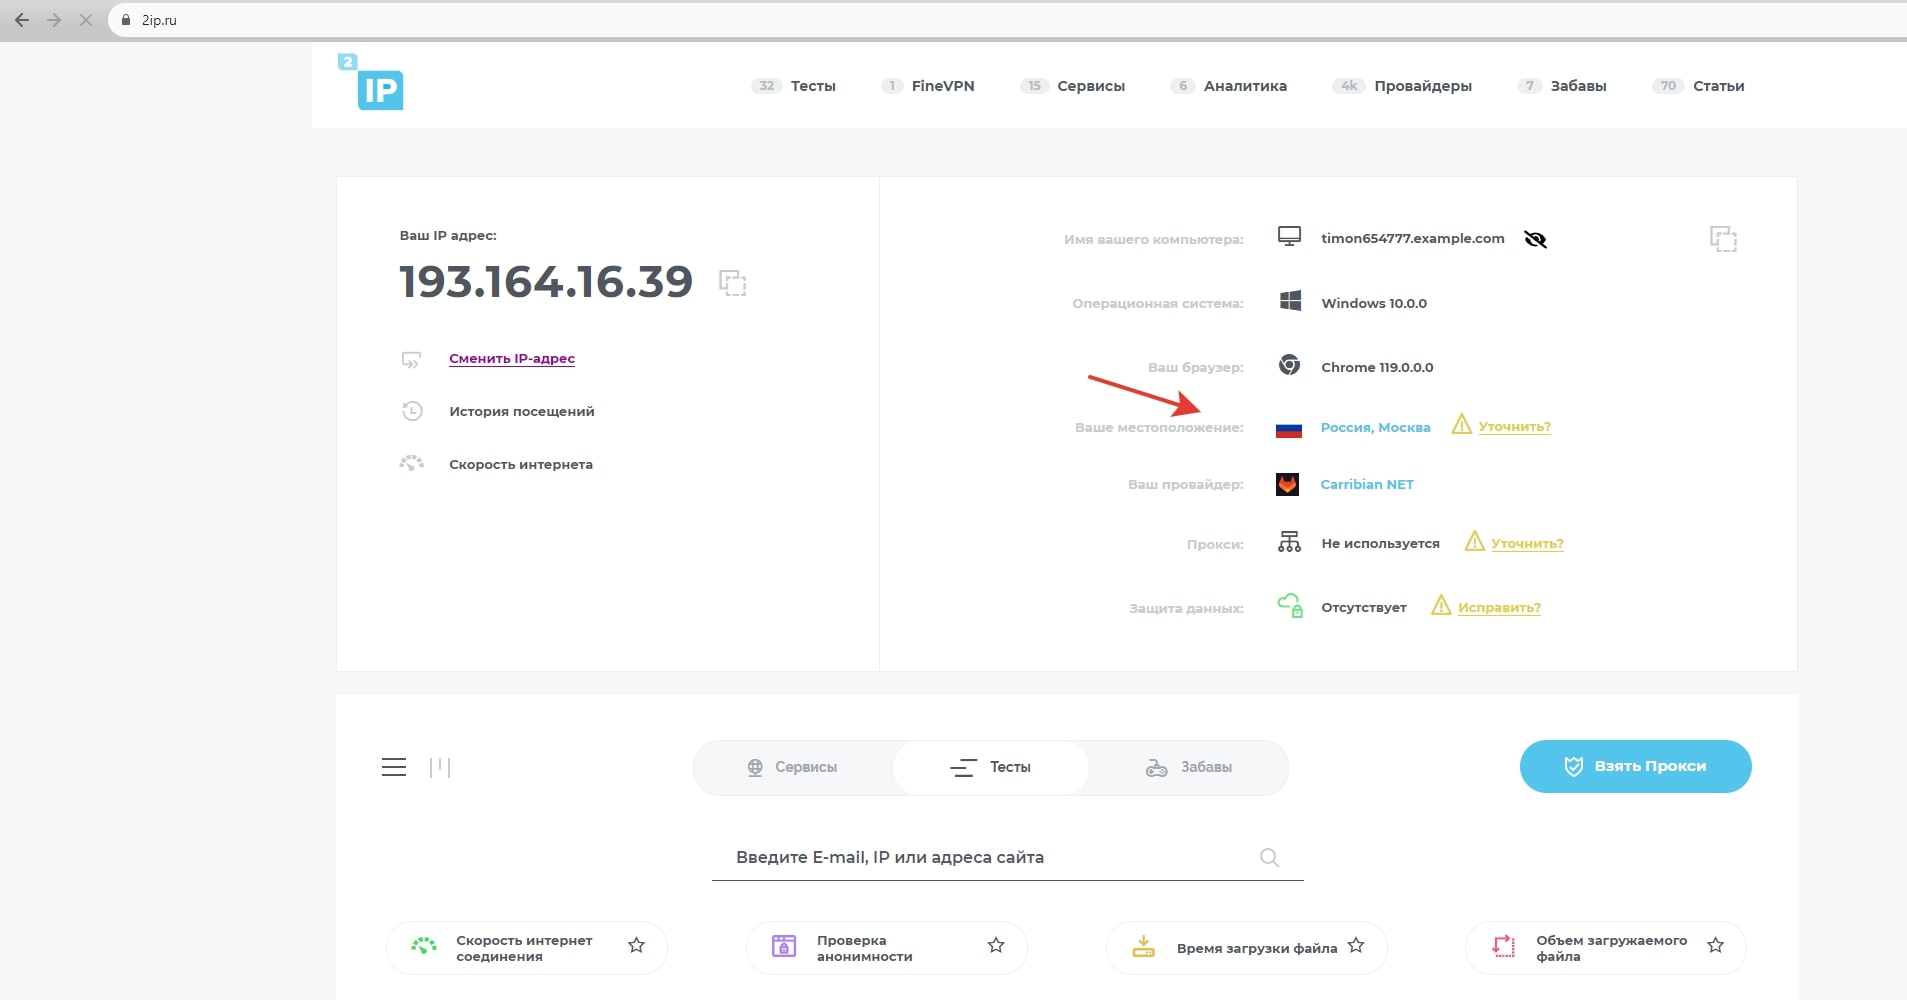
After downloading the file, click "Connect" and wait until the connection is activated. When the connection is active, your PC begins to use a WireGuard tunnel with the server. To check the operation of the VPN, you can use the 2ip service, which will provide information about your Internet connection and IP address. This completes the installation and basic configuration of the WireGuard server.